Everyday recipes, life and craziness from Jen's house.

Sunday, July 18, 2010

Chicken Flat Bread Sandwiches

Last night JP and I attended a geocaching event, Riverside Pond Fireside Chat.  It was a lot of fun seeing some of our geocaching friends!  I made Chicken Flat Bread Sandwiches to take to the picnic and got several comments of how great they looked!  So without further ado...

Sorry about the half eaten sandwiches...they were just so yummy (and huge!)  This picture was taken this morning...these are the leftovers from last night!  You can see that JP ate the tomatoes and red peppers out of sandwich! 


Chicken Flat Bread Sandwiches


Makes 2 extra large sandwiches

2 pieces of flat bread (I bought a package of garlic flat bread from Walmart.  The label said "Flat Bread" and "Naan.")

1/4 c. mayonnaise
8 basil leaves, thinly sliced
1/8 t. garlic powder
1/4 c. hummus (like my Yummy, Yummy Hummus! but any type of hummus will do)


1 Chicken breast, thinly sliced (you can use any type of lunch meat, or combination)

4 slices Cheese  (you can use any type of cheese you'd like!)
1 thinly sliced red pepper
1 thinly sliced tomato
1/2 onion, thinly sliced


 Mix the mayo, garlic and basil together.  Stir well.

To make each sandwich:  Cut each piece of bread in half.  Place one half on a large piece of tin foil.  It should be about in the middle, but fold up the bottom edge of the foil to make sure you have enough to cover the bread.  This will help hold in the juicy goodness of your sandwich.  Unfold the tinfoil and prepare your sandwich!  Spread half of the mayo mixture on 1 piece of the flat bread.  Spread the other piece of flat bread with half of the hummus.  Layer on the sliced red pepper, tomatoes and onion.  Also add the thinly sliced chicken and cheese.  Top with the flat bread that has been spread with hummus.  Fold up the tin foil to cover the sandwich.  Tuck in the sides and secure the top.  

When you're ready to eat, just peel back the foil from the top of the sandwich.  You'll have a little pouch that will hold the juicy sandwich in!  You can peel the foil back as you eat and save your shirt from any drips! 


Review:  This sandwich is very versatile.  You can use any type of meat or cheese (I just happened to use left over chicken breasts from the night before!)  You can also use any type of veggies that you like.  Cucumbers would be great in this sandwich, along with feta cheese!  Next time, I might use a wrap type bread instead of the flat bread, just to try something different.  Enjoy~

Friday, July 16, 2010

Yummy, Yummy Hummus

Cabbagetown Hummus by daveleb.


JP and I were at the Commissary (aka Grocery Store for those of you who aren't familar with the military) today and I snagged 2 cans of garbanzo beans (aka chick peas.)  So when I got home, I knew I was going to whip up some hummus.  This isn't my usual recipe, but I thought I'd give it a shot.  I stumbled across David Lebovitz's website via Google.  You should check it out sometime.  There are some really great recipes!  And the rest is hummus history!  Enjoy~


Hummus

Makes 6 to 8 servings Adapted from the Cabbagetown Café Cookbook (Crossing Press) by Julie Jordan


3 large cloves of garlic, coarsely chopped, I used 2 cloves of garlic
1 teaspoon coarse salt
3/4 cup (180g) tahini (sesame paste)
2 tablespoons olive oil
1/3 cup (80ml) freshly-squeezed lemon juice
2 cups (350g) drained canned chickpeas, (reserve the liquid) I used 2 cans
1 cup (15g) gently-packed parsley leaves, preferably flat-leaf I skipped the parsley...didn't have it on hand!
1/8 teaspoon chile powder
6 tablespoons (or more) of chickpea liquid

I added 1 jar of Libby's Roasted Red Pepper, drained

1. In a blender (I used a food processor), whiz together the garlic, salt, tahini, olive oil, and lemon juice until the garlic is finely-chopped.
2. Add the chick peas, parsley leaves, chile powder, and 6 tablespoons of chick pea liquid, and pulse until smooth. Stop the machine a couple of times during blending to scrape down the sides to make sure everything gets well-incorporated.
3. Taste, and add more lemon juice or salt if desired, and more of the chick pea liquid until it reaches a thick, but spreadable consistency. You can make it as smooth, or as coarse, as you want. I like mine mid-way between the two.

Serving: I make a well in the center and drip in some good olive oil and cracker pepper in the crater. Serve with toasted pita chips, baguette slices, or whole wheat crackers. Sometimes I'll add a generous sprinkle of chopped chives or scallions along with the parsley to my hummus as well. It's also good with raw vegetables, as a dip.
Storage: Hummus will keep in the refrigerator for up to four days. You can also freeze hummus, well-wrapped, for up to two months.

Review:  I really liked this recipe!  It's a little different from the one that I usually use, but this will be added to my (ever expanding) recipe file!  Enjoy~

Thursday, July 15, 2010

Spicy Pasta Salad and Southwest Seasoning


JP LOVES this Spicy Pasta Salad.  He begs me to make it at least once a week.  It takes a little while to chop the vegetables, but it is a fairly easy recipe to follow.  This salad is great for a meatless dinner, or as a side dish.  I use whole wheat pasta, plain fat-free yogurt, and lots of veggies to make this salad healthy.  I make my own southwest seasoning, but feel free to use whatever you have on hand.  Spice up the salad (or tone it down) according to your tastes!  Enjoy~

 Southwest Seasoning

I am really picky about my Southwest Seasoning.  I don't care for packaged taco seasoning...too much salt and lots of other things I don't want to have in my food!  I also like things a little spicy, so I make my own Southwest Seasoning with that little extra kick! I use this Southwest Seasoning in my Spicy Pasta Salad, or in any recipe that calls for Taco Seasoning.

McCormick has a Southwest Seasoning.  Also, Penzeys has a Southwest Seasoning and a south of the border spice, Arizona Dreaming.  I haven't tried any of these blends, but can't wait to try them, especially Arizona Dreaming!  According to Penzeys website,
  •  "Arizona Dreaming is simply a delicious all-purpose coming together of spices. The flavors of South of the Border combined in ways that Americans love so much. Great for just about everything, use frequently to season: Vegetables, Rice, Beans, Beef, Pork, Scrambled Huevos, Ground Turkey, Cheese, Salad Dressings."


Jen's Southwest Seasoning
1/2 c. chili powder, I use Penzeys Medium Hot
1/3 c. paprika, I use Penzeys Smoked Paprika
1/4 c. cumin
1/4 c. onion powder
1/4 c. garlic powder
1/4 c. cornstarch
3 T. chipotle powder, I use Penzeys Ground Chipolte Pepper
1 T. salt
1 T. cayenne pepper, I use Penzeys Ground Cayenne Pepper
1 T. oregano
1 T. crushed red pepper, I use Penzeys Crushed Red Pepper


Pasta Salad

Spicy Pasta Salad

1 package pasta, cooked according to directions, I use Ronzoni's Healthy Harvest Rotini

1 c. plain fat-free yogurt
1/4 c. mayonnaise
4 T. southwest seasoning (use less if you like things less spicy)
1 lime, zested and juiced

1/2 green pepper, chopped
1/2 red pepper, chopped
1 medium onion, chopped
1 jalapeno, diced
1/2 pint cherry tomatoes, cut into 1/8ths, or 1 tomato, chopped
1 can of corn, drained
1 c. cheddar cheese, shredded, I use 2% cheddar
1/4  bunch cilantro, chopped

Mix yogurt, mayonnaise, taco seasoning and lime zest and juice together in a small bowl.

In a large bowl, mix the cooked pasta, chopped peppers, onion, jalapeno, tomatoes, drained corn, shredded cheese and cilantro.  Pour the prepared dressing over the pasta mixture and stir well.

Refrigerate.  Stir well before serving.

Review:  If you like things a little spicy (like I do!), add an extra jalapeno or two!  Or leave out the jalapeno if you'd like.  This is a really versatile salad, you can add ingredients you like (like chopped olives) or leave out ingredients you don't like.  I've used a can of canned, chopped tomatoes when I didn't have cherry tomatoes on hand.  Enjoy~

Thursday, July 8, 2010

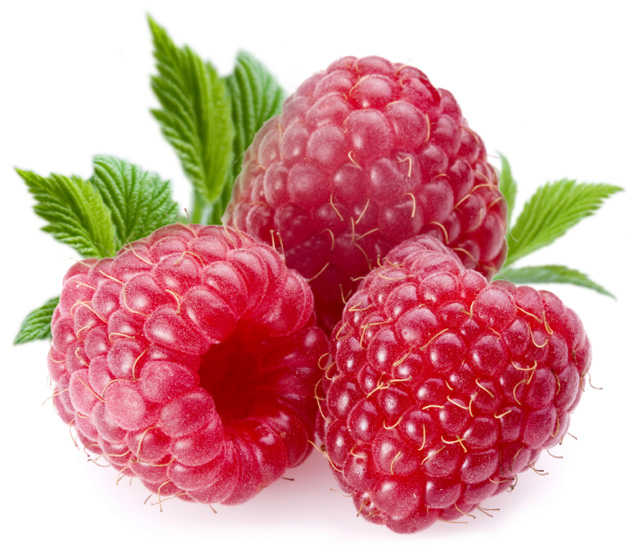
Raspberry Swirl Brownies


I got together with my Bunco group tonight and made some yummy brownies!  My Bunco group meets once a month and we play a couple of games of Bunco.  We talk, laugh, gossip and eat some scrumptious food. 

I hemmed and hawed about what to bring tonight.  I wanted to use up some frozen raspberries, I had a package of cream cheese and a brownie mix on hand.  So I looked at several recipes on allrecipes.com and combined a couple to make up my recipe. 

Raspberry Swirl Brownies


1 package brownie mix
10 ounce package of frozen raspberries, slightly thawed
8 ounce block of 1/3 Less Fat "Neufchâtel"cheese (or regular cream cheese)
1/3 c. sugar
1 t. vanilla
1 egg
plain fat free yogurt


Mix the brownie batter according to the package, except decrease the oil by half.  Replace the oil you didn't use with plain, fat free yogurt.


In a medium bowl, mix the cream cheese, sugar and egg together.  Smash the raspberries and add to the cream cheese mixture.  Swirl raspberries in, but don't mix until combined. 


Preheat oven to directions on box of brownie mixture.  Spray a 9x11 inch baking dish with non-stick cooking spray.  Pour half of the brownie mixture into the prepared pan.  Spoon the cream cheese and raspberry mixture onto the brownie batter in the pan.  Top with the remaining brownie batter.  

Drag a knife through the brownie mixture, up and down and back and forth to swirl the cream cheese and raspberry mixture in with the brownie batter.  Bake according to the package directions.  

Review:  These were very good brownies!  Everyone at Bunco enjoyed them.  The cream cheese added a tang, while the raspberries added depth and great flavor.  Next time, I would add 1 T. of flour to the cream cheese and raspberry mixture.  The flour would make the cream cheese mixture a little bit more firm.  This brownie recipe will go into my recipe file.  Enjoy~ 

Wednesday, July 7, 2010

Julia Child with a Dash of Jenny!

Tonight I was checking Facebook and I received a message from my friend Jenny.  I've know Jenny for about a year now.  She and her husband, Jeremy, are fellow geocachers!  If you'd like to learn more about geocaching, click on the link!  I also have a geocaching blog, as do Jenny and Jeremy.  (Shameless plug, I know.)  Anyways, Jenny had a wonderful new recipe to share!  I can't wait to make this!  Enjoy~


 Here's a picture of Jenny and Jeremy with their 1,000th geocache find!

This last weekend, I had Outback Steakhouse's French Onion Soup. It was delicious, as usual. But I couldn't get the taste out of my mouth, so I began to hunt for recipes. Low and behold, I come across Julia Child's full-proof and simple recipe for the soup. Here's the recipe and I highly recommend it to anyone who loves a good, hearty soup any time of the year.

 French Onion Soup

¼ cup olive oil
2 tablespoons butter
2 cloves garlic, pressed
3 lbs onions, thinly sliced
2 cups dry white wine
1 teaspoon white sugar
8 cups beef broth
6 slices Provolone cheese
12 toasted French baguette slices or Texas Toast, flavored croutons
Salt and freshly ground black pepper

Preparation:


Melt the oil and butter in a big pan over a medium heat, and then add the sugar, garlic, and onions. Sauté until they are slightly colored for about 6 minutes. Add the white wine and bring the mixture to a boil. Turn the temperature back down to medium and cook for 5 minutes, then pour in the broth.


Turn the temperature up to medium high, and then back to low.


Let the onion soup simmer for 90 minutes, uncovered.


You can freeze the soup at this point if you like.


Preheat the oven to 400. Put a couple of slices of toasted bread on each one, and then sprinkle the cheese over the top. Put the soup bowls on a shallow baking pan and bake until the cheese melts.


This will take about a minute.


(Serves 6)


*I served it with grilled cheese sandwiches, filled with Thousand Island dressing and Swiss Cheese - kind of a play on the Reuben minus the meat, but meat could be added easily.

*Season with salt AFTER it has simmered for 90 minutes and taste to see if it is salty enough. Keep in mind the cheese and croutons add a lot of salt to it, too.

*I also added about a 1/4 cup port wine to add some depth of the beef broth, this seemed to help a lot. I would highly recommend keeping the white wine as the base, though and not flip-flopping the red for white.

I hope you enjoy this recipe as much as we did! It's definitely going to be a stand-by meal from now on at our house!

Tuesday, July 6, 2010

Quick and Easy Sloppy Joes (aka Maid-Rites or Loose Meat Sandwiches)

My mum made Sloppy Joes when I was growing up.  It is a quick and easy meal and oh, so tasty!  When Jeff and I were dating, I made Sloppy Joes for dinner.  Our conversation went like this:

"Here you go, enjoy your dinner (this was before I called dinner supper)!"

"Oh, these are Maid-Rights."

"Maid who???"

"Ya know, Loose Meat." 

I replied, "Loose what???"

I had never heard of Maid-Rights or Loose Meat.  I knew these tasty sandwiches as Sloppy Joes.  Oh wait, I had heard of Loose Meats...back when Roseanne was a popular TV show, she had a restaurant that served Loose Meat.  That was before Google and the ability to have information at your fingertips in seconds flat.  I don't know what I thought Loose Meat was, but I never imagined it to be a Sloppy Joe!

Jeff has come to love my Sloppy Joes.  As I said earlier, they are quick, easy and good.  We usually have Tator Tots and corn...if I start the Tots cooking, by the time they are done, the Sloppy Joes are done, too.  Enjoy~

Sloppy Joes
serves 4-6


1 lb. hamburger (I use 96%)
1/2 medium onion, finely chopped (or 1/2 t. onion powder)
2 cloves of garlic, pressed (or 1/4 t. garlic powder)
2 t. Worcestershire Sauce
1/4 c. relish
3/4 c. ketchup


Brown the hamburger with the onion and garlic (or onion and garlic powder, if using) until the meat is done.  Add the Worcestershire Sauce, relish and ketchup.  Stir well to combine.  Turn to low and simmer for 10 minutes.  Serve on a toasted hamburger bun or English muffin.  Top with cheese if desired.

Review:  I usually use English muffins instead of hamburger buns (because that's what we usually have on hand!) and I top it with a slice of cheese.  You can add more/less ketchup to taste.  More ketchup makes for a sloppier joe, but will increase the number of sandwiches you can make.  Sometimes I serve this without any type of bread, just a scoop on a plate.  Jeff enjoys corn mixed into his Sloppy Joes.  He's an Iowa boy at heart and loves the meat and corn mixture...toss in some potatoes (tots!) and he's in 7th heaven!  Enjoy~

Monday, July 5, 2010

Family, Food and Fourth of July

JP and I traveled to Dunlap, Iowa to spend the Fourth of July with my in law family.  We had lots of laughs, lots of great food and lots of fun.  We even got to meet (and hold) the newest member of the family.

Dunlap is a small town that has a big Fourth of July.  The Fourth kicks off with the Boy Scouts raising the flag and a Fun Run/Walk.  There are two parades:  a kiddie parade, a "regular" parade.  The kiddie parade is always a big hit.  Kids ride decorated bikes, trikes, scooters, or just about anything with wheels!  Those not old enough to pedal on their own are pulled in wagons or strollers.  The kiddie parade goes around the block with kids trying not to crash and parents walking (or running when they get going fast enough!) along with them.  After the parades, there are activities in the park.  There are food stands, Bingo, a hot dog eating contest, kiddie games, bouncy slides, a BBQ contest and of course, visiting with family and friends.  Throughout the day, there are picnics, parties and fire cracker!  It all ends with a spectacular fire works display.  The volunteers who put this big event on every year deserve a round of applause.  The volunteer fire department deserves a standing ovation for the fireworks they set off every year.   This year was a little different, though.  

RAIN.  

Even though the kiddie parade, the regular parade and the park activities were canceled, we still had a great time!  Grandma Ronk still had her annual picnic.  We still laughed and visited with friends and family.  Despite the rain, we had a terrific time.  I love spending the Fourth of July in Dunlap! 


My sister-in-law, Kelly, made grape salad for the picnic at Grandma Ronk's.  I don't have her recipe, but my mum made a similar recipe when I was growing up.  Enjoy~

Sour Grapes

4 c. seedless green grapes
1 c. sour cream
1/2 c. brown sugar


Wash and remove the stems from the grapes.  Dry the grapes with a paper towel.  Mix the sour cream and brown sugar together.  In a medium bowl, mix the grapes and sour cream mixture together.  Refrigerate for 2 hours.  Enjoy~

Review:  This is a refreshing dessert.  The tart grapes blend well with the sweetness of the brown sugar.  This recipe is easy to transport to picnics and is great on a hot day.